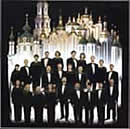
Two Steps From Heaven

Classical Crossover

Sacred Choral Music
by Kiev Chamber Choir

Video:
Ukrainian Folk Music
Free Dog Clipart

Classical Crossover

Sacred Choral Music
by Kiev Chamber Choir

Video:
Ukrainian Folk Music
Free Dog Clipart
Russian Orthodox Church Sacred Choral Music on Amazon
ALL ABOUT
AVE MARIA LYRICS
Celine Dion: What Does She Sing?
MOBILE WEBSITE
 DOWNLOAD THIS SONG FOR FREE You won't find this song anywhere on the Internet. CHAPTER 1 1. Four Questions 2. You’re working on a budget , after all 3. Controlling the Acoustics 4. Room Arrangement 5. Early Reflection Points 6. 50 Percent Rule 7. Bass Traps You’re working on a budget , after all Don’t outfit your home to do the big work. If you have a limited budget to build a studio, why invest in all the necessary microphones, microphone stands, and cables? You start there and you could be well into thousands of dollars. Let somebody else spend that money. Go to a studio that’s already outfitted with all the accoutrements, cut the drums and have the engineer transfer the tracks or a stereo mix so you can overdub guitars, bass and vocals at home. If you have a limited amount of money, why not put it into a vocal recording system? Get the correct microphone for an acoustic, get the best microphone for an electric, and cut all that at home. You can leave the big, multi-channel recording to a professional studio.” Controlling the acoustics Whatever your expectations, a major component to creating quality finished recordings in a home environment is controlling the acoustics. To really do things right, it starts with the construction of the room. The proper angles of the walls and ceiling, the proper dimensions, state-ofthe- art acoustical room treatments placed in the appropriate places — these are but a few of the things that set a professional studio apart from your rehearsal space and bedroom. The first step toward achieving an acoustic environment that will produce great results at home is understanding some of the basic principles of how sound waves work and how to control the way they inhabit and interact in a room. When a sound wave meets a surface — a wall, a couch, a desk — some of the wave is absorbed, some of it is reflected, and some of it gets transmitted through the surface. Most dense surfaces do a good job isolating sound, but will reflect sound back into the room. Porous surfaces typically absorb sound well, but also transmit sound. The best way to stop sound transmission — sound leaking in or out of a room — is to isolate sound from the structure before it has a chance to vibrate. In other words, walls need to be isolated from ceilings and floors, achieved by decoupling — referred to as “floating” a room. But floating a room is precisely the type of construction effort that isn’t an option for most people. So what can you do? Click here to continue |
HOW TO MAKE HOME
|
DOWNLOAD THIS SONG FOR FREE
You won't find this song anywhere on the Internet.
HOW TO MAKE HOME RECORDING STUDIO